
How To Take Amazing Snow Photos!
Breathtaking Winter Scene.
How to take amazing snow photos is something you want to do at least once in your lifetime. Don't let the cold bother you - let's get our cameras and head outside for this awesome experience!
As you are driving around, look at your surroundings. What do you see? Do you see icicles hanging off from above? Snow cascading down on a mountain? Frozen lakes or rivers? Snow clinging onto trees or bushes? These are just suggestions on where to start.
If you have children, find a playground or perhaps a hill to play or sled down on. If you choose to do shots with movement, make sure you have an action or a sports setting on your camera, as you will need to use it.
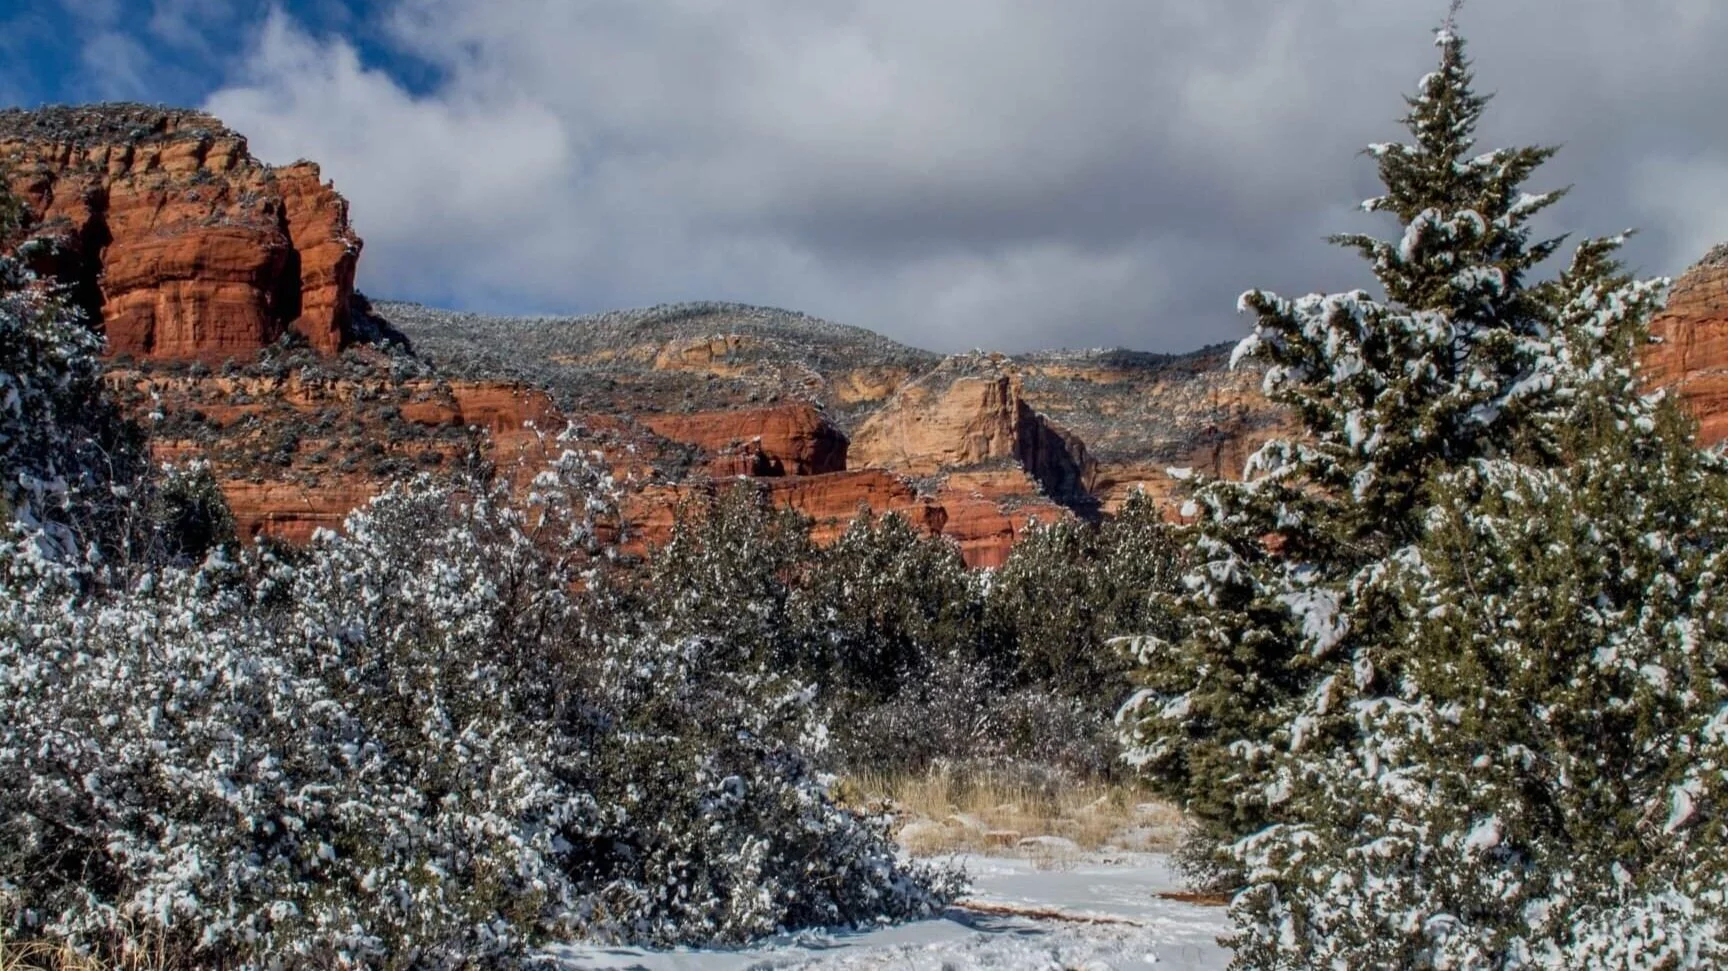
Looking at this photo, there is a hiking trail that is covered with snow. I placed myself by the trail, with the mountains in one side and the trees on the other. Do you see how the clouds bring drama into this photo? The only editing I did was to enhance the color. Everything else is real.

Always check your lens for smudges, water spots or any specks on it. I have paid dearly for photos with the mentioned items on my lenses and had to delete some really beautiful photos. Have a lens cloth ready for those in between photo shoots for a quick clean up.
Before we get into the snowy part, let's talk about the settings you can choose for those fantastic snow photos. You have 4 choices to make for the camera settings: auto, program, aperture or manual. I tend to go to manual as I want to manipulate the colors myself as well as challenge my photo skills:
Auto mode is very simple as you just put your camera in that mode, aim your camera at your subject and take a photo. Auto takes the guess work out of how light or dark your photo will be, clarity, just basically everything.
Program mode is almost like auto mode, except you can change your ISO to anything you want. This is also a great way to start learning to get out of auto mode and prepare yourself for the next stage of learning about your camera. I used the program mode for many years and it worked out great.

Camera settings.
Aperture mode is the next step up to challenging yourself in taking photos. This setting tells you how much light will come into the lens. But this is the weird part: the lower the number, the more the light comes in. So, if you have shadows, or it is overcast outside, you will want to have your aperture in the lower numbers. However, when it is sunny, raise up your aperture, or you will have a white out on your photos! Also with this mode, you may have blurriness around the edges of your photos, which can add a nice effect to it.
Manual mode is, honestly, the best mode to be in.
Not only do you control the ISO and aperture, but also how fast the shutter speed control moves. The lower the number, the slower it is. The higher the number, the faster the speed is. Basically, what I do is play around with my different controls. Make sure when you do, look at your screen of your camera (if you have one) and see what your subject looks like before click that magic shutter button. Is it too bright? Adjust your settings, meaning, you will have to do both the aperture and manual settings in opposite directions. Is it too dark? Adjust your settings again. Always refer back to your camera's guide, if you have one.
Let's get to the exciting part! But first, do you want to take a break for hot chocolate or hot apple cider? It sounds absolutely scrumptious to me! Lets get something to drink and join me right back here for more exciting photography lessons!
Time for those amazing snow photos! I generally have my camera set at 100 ISO. I live in a sunny state, so the 100 setting is perfect. Find some trees with snow on them and take photos all around them. Always take several photos - one too many is never too much. For the aperture setting, start with f/8, and for the manual setting, start with a speed of 1/100. Then, play around with those settings until the subject looks crystal clear on your camera screen.
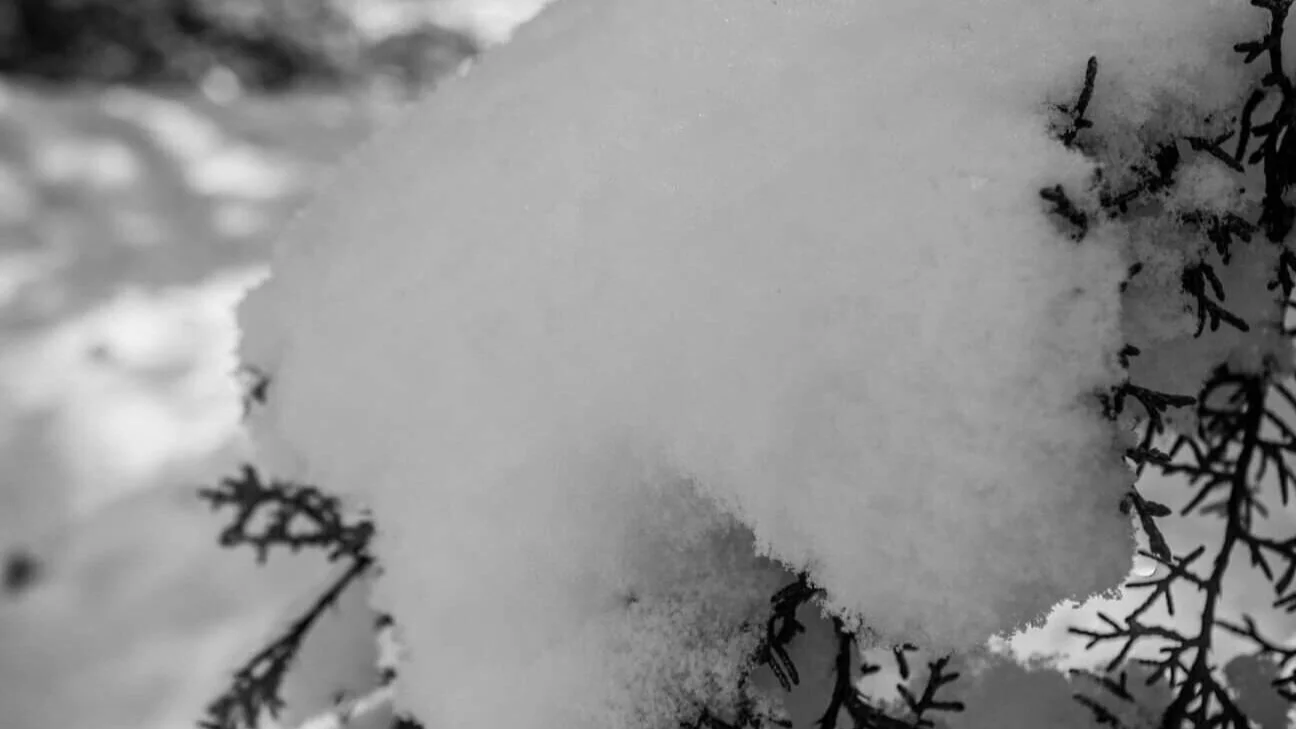
Clump of snow on pine tree.
Look for snow on mountains, tree logs, desert vegetation, even the side of the road. I tend to look for contrasting items to take photos of together. It makes it a more delightful and intriguing photo. For this photo, I just bent down (it is sometimes important to get close to your subject), set my camera in aperture mode, made sure the lighting was good, and took the photo. Notice how the foreground is clear and the background is blurry? It really emphasis the subject, which is what I wanted it to do.
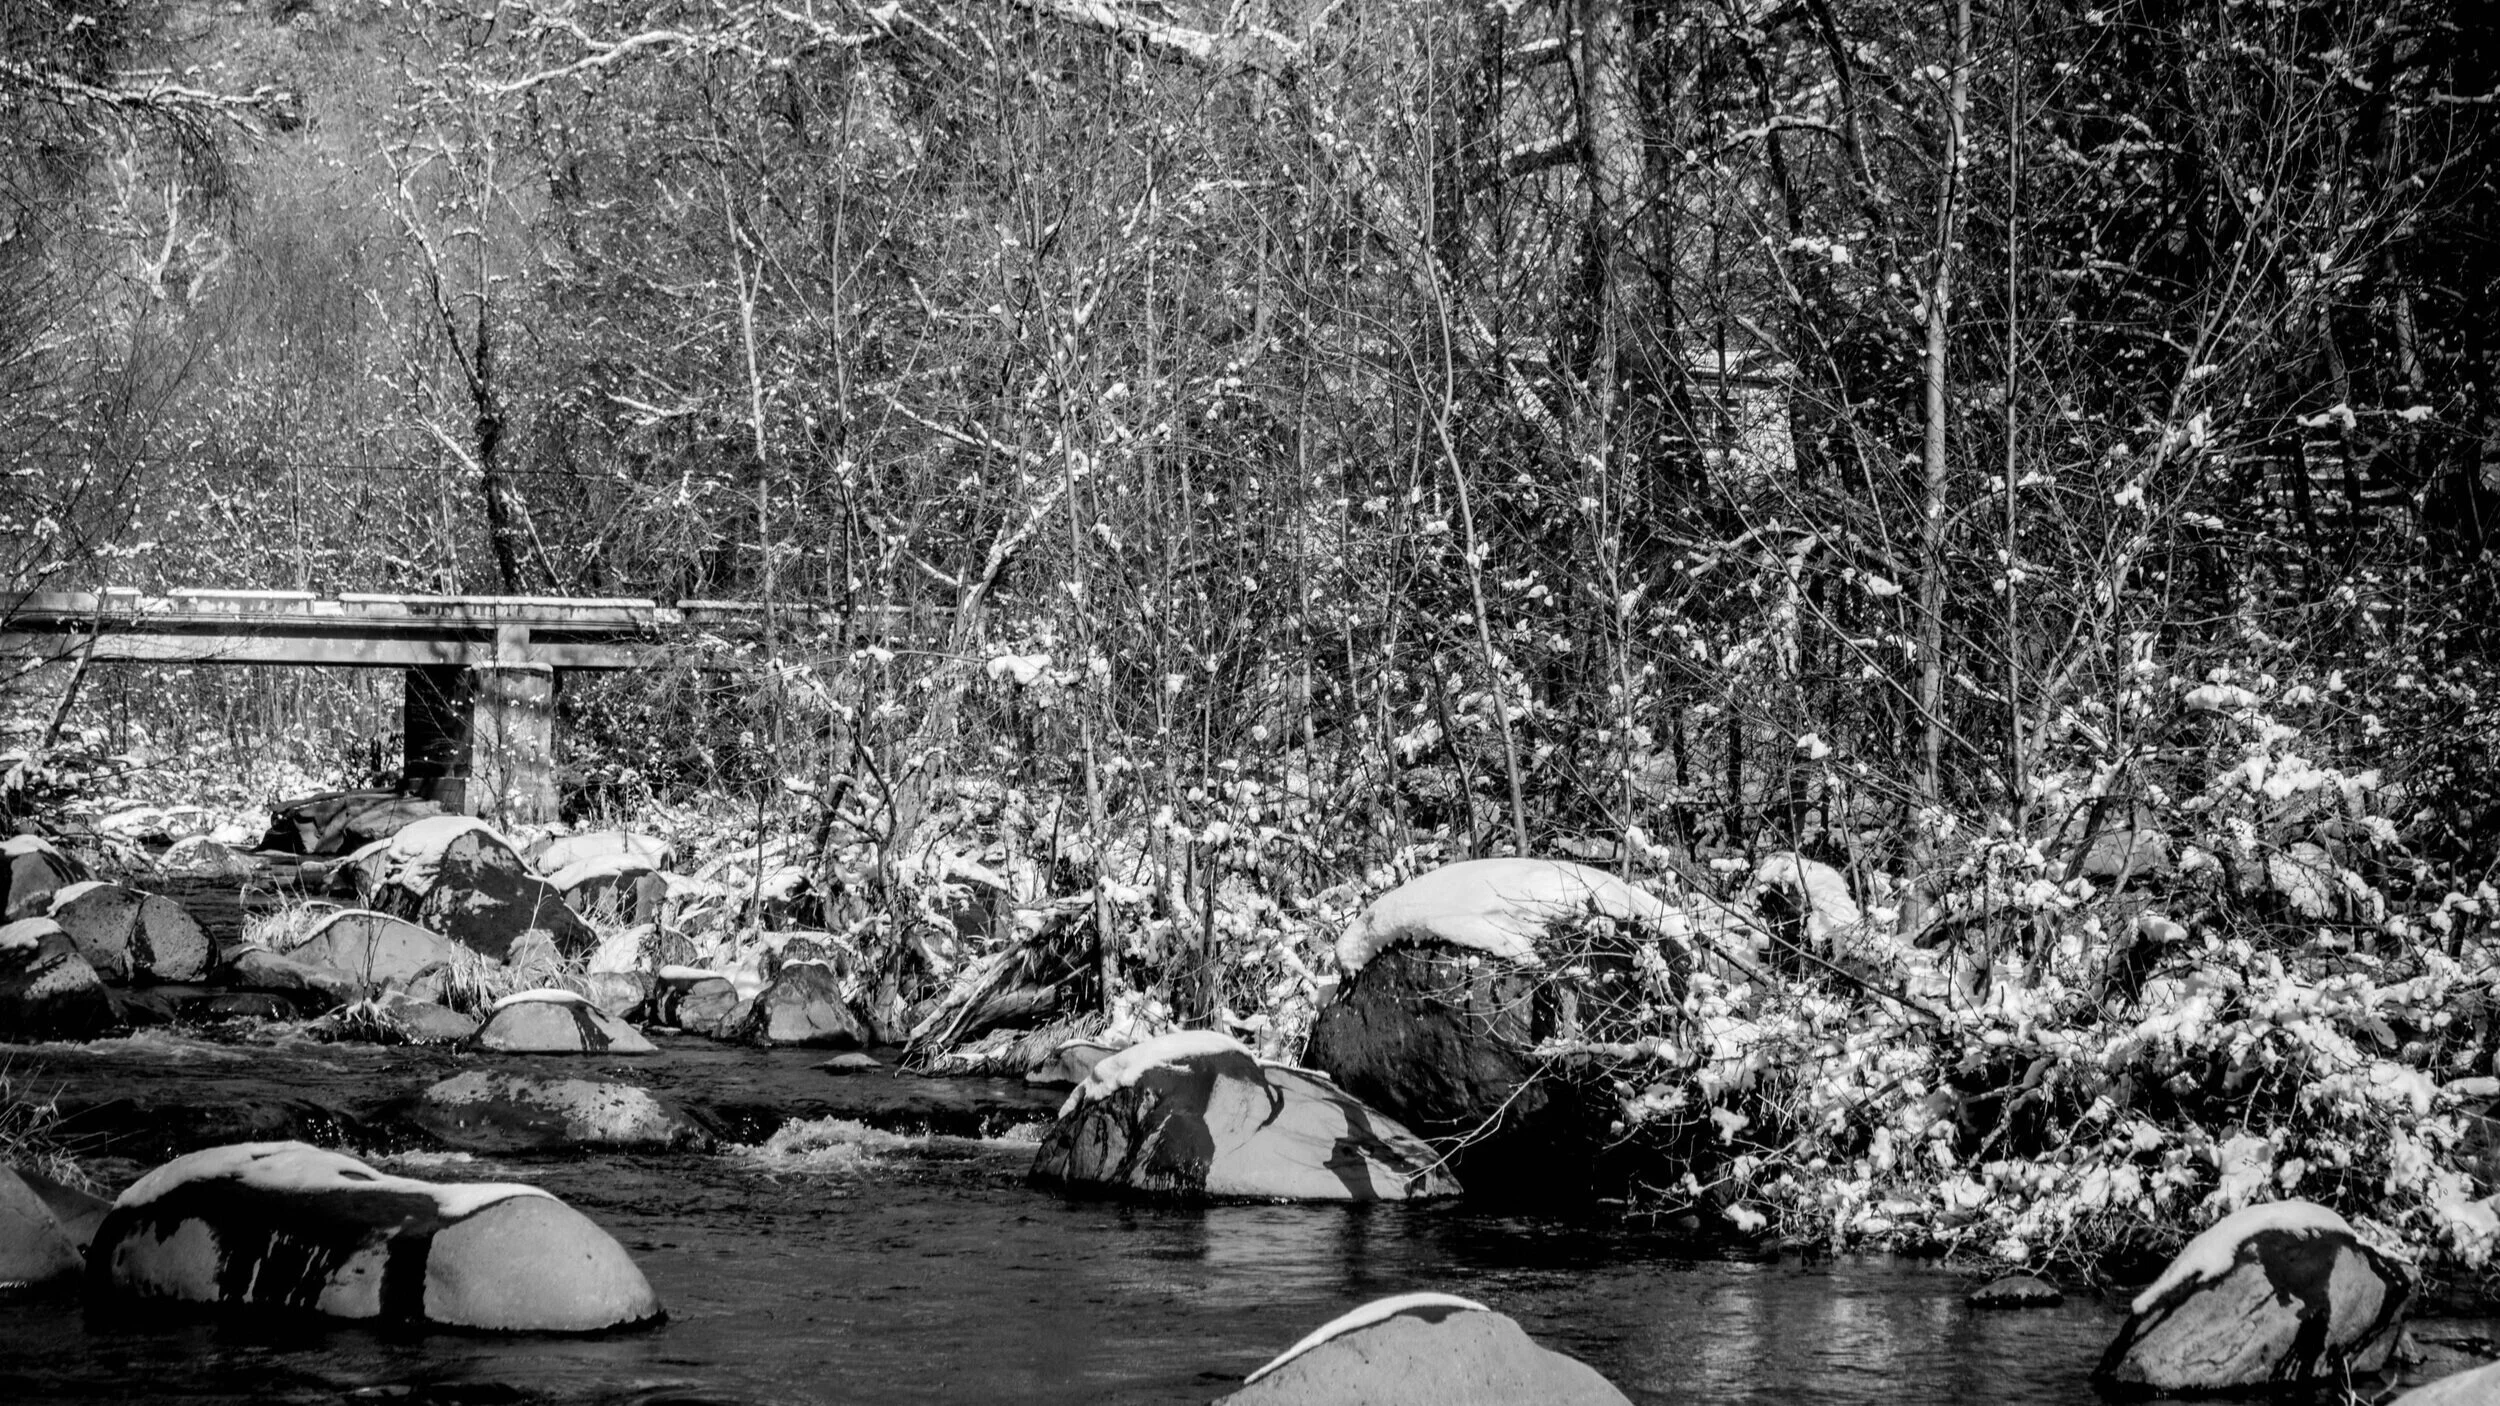
Snowy Landscape Scene.
Another tip is to use rule of thirds when you can. It is recommended, but not required. Notice in this photo how I have a bridge to the left, trees on the right, blending into the bridge and the river in the foreground? This is beautifully done with much thought, and very cold feet! I had to climb down to get to this part, besides some careful walking as there was water also along the bank of the river.
There you have it! A quick run-down of camera settings and suggestions for those amazing snow photos! Let us know what winter photos you like to take, and share with us any suggestions you may have!